
In the previous post I finished with explaining the Kubernetes Services. The next logical step after you learn about Kubernetes Services, is to learn what an Ingress resource is and how you can use it to give users the ability to access the applications running inside your Kubernetes cluster.
This article covers the following topics:
- Installing the Ambassador API gateway
- Single service Ingress
- Path-based routing with Ingress
- Name-based Ingress
The examples in this article are using a Kubernetes cluster running on Minikube.
You can fork/clone the GitHub repository with supporting YAML files, so you don't have to copy/paste the YAML used in the articles.
Exposing multiple applications with Ingress
An Ingress resource can be used to manage external access to the services running inside your cluster. With the Ingress resource you can define the rules on how the services inside the cluster can be accessed.
The Ingress resource on its own is useless. It's a collection of rules and paths, but it needs something to apply these rules to. That "something" is an ingress controller. The ingress controller acts as a gateway and routes the traffic based on the rules defined in the ingress resource.
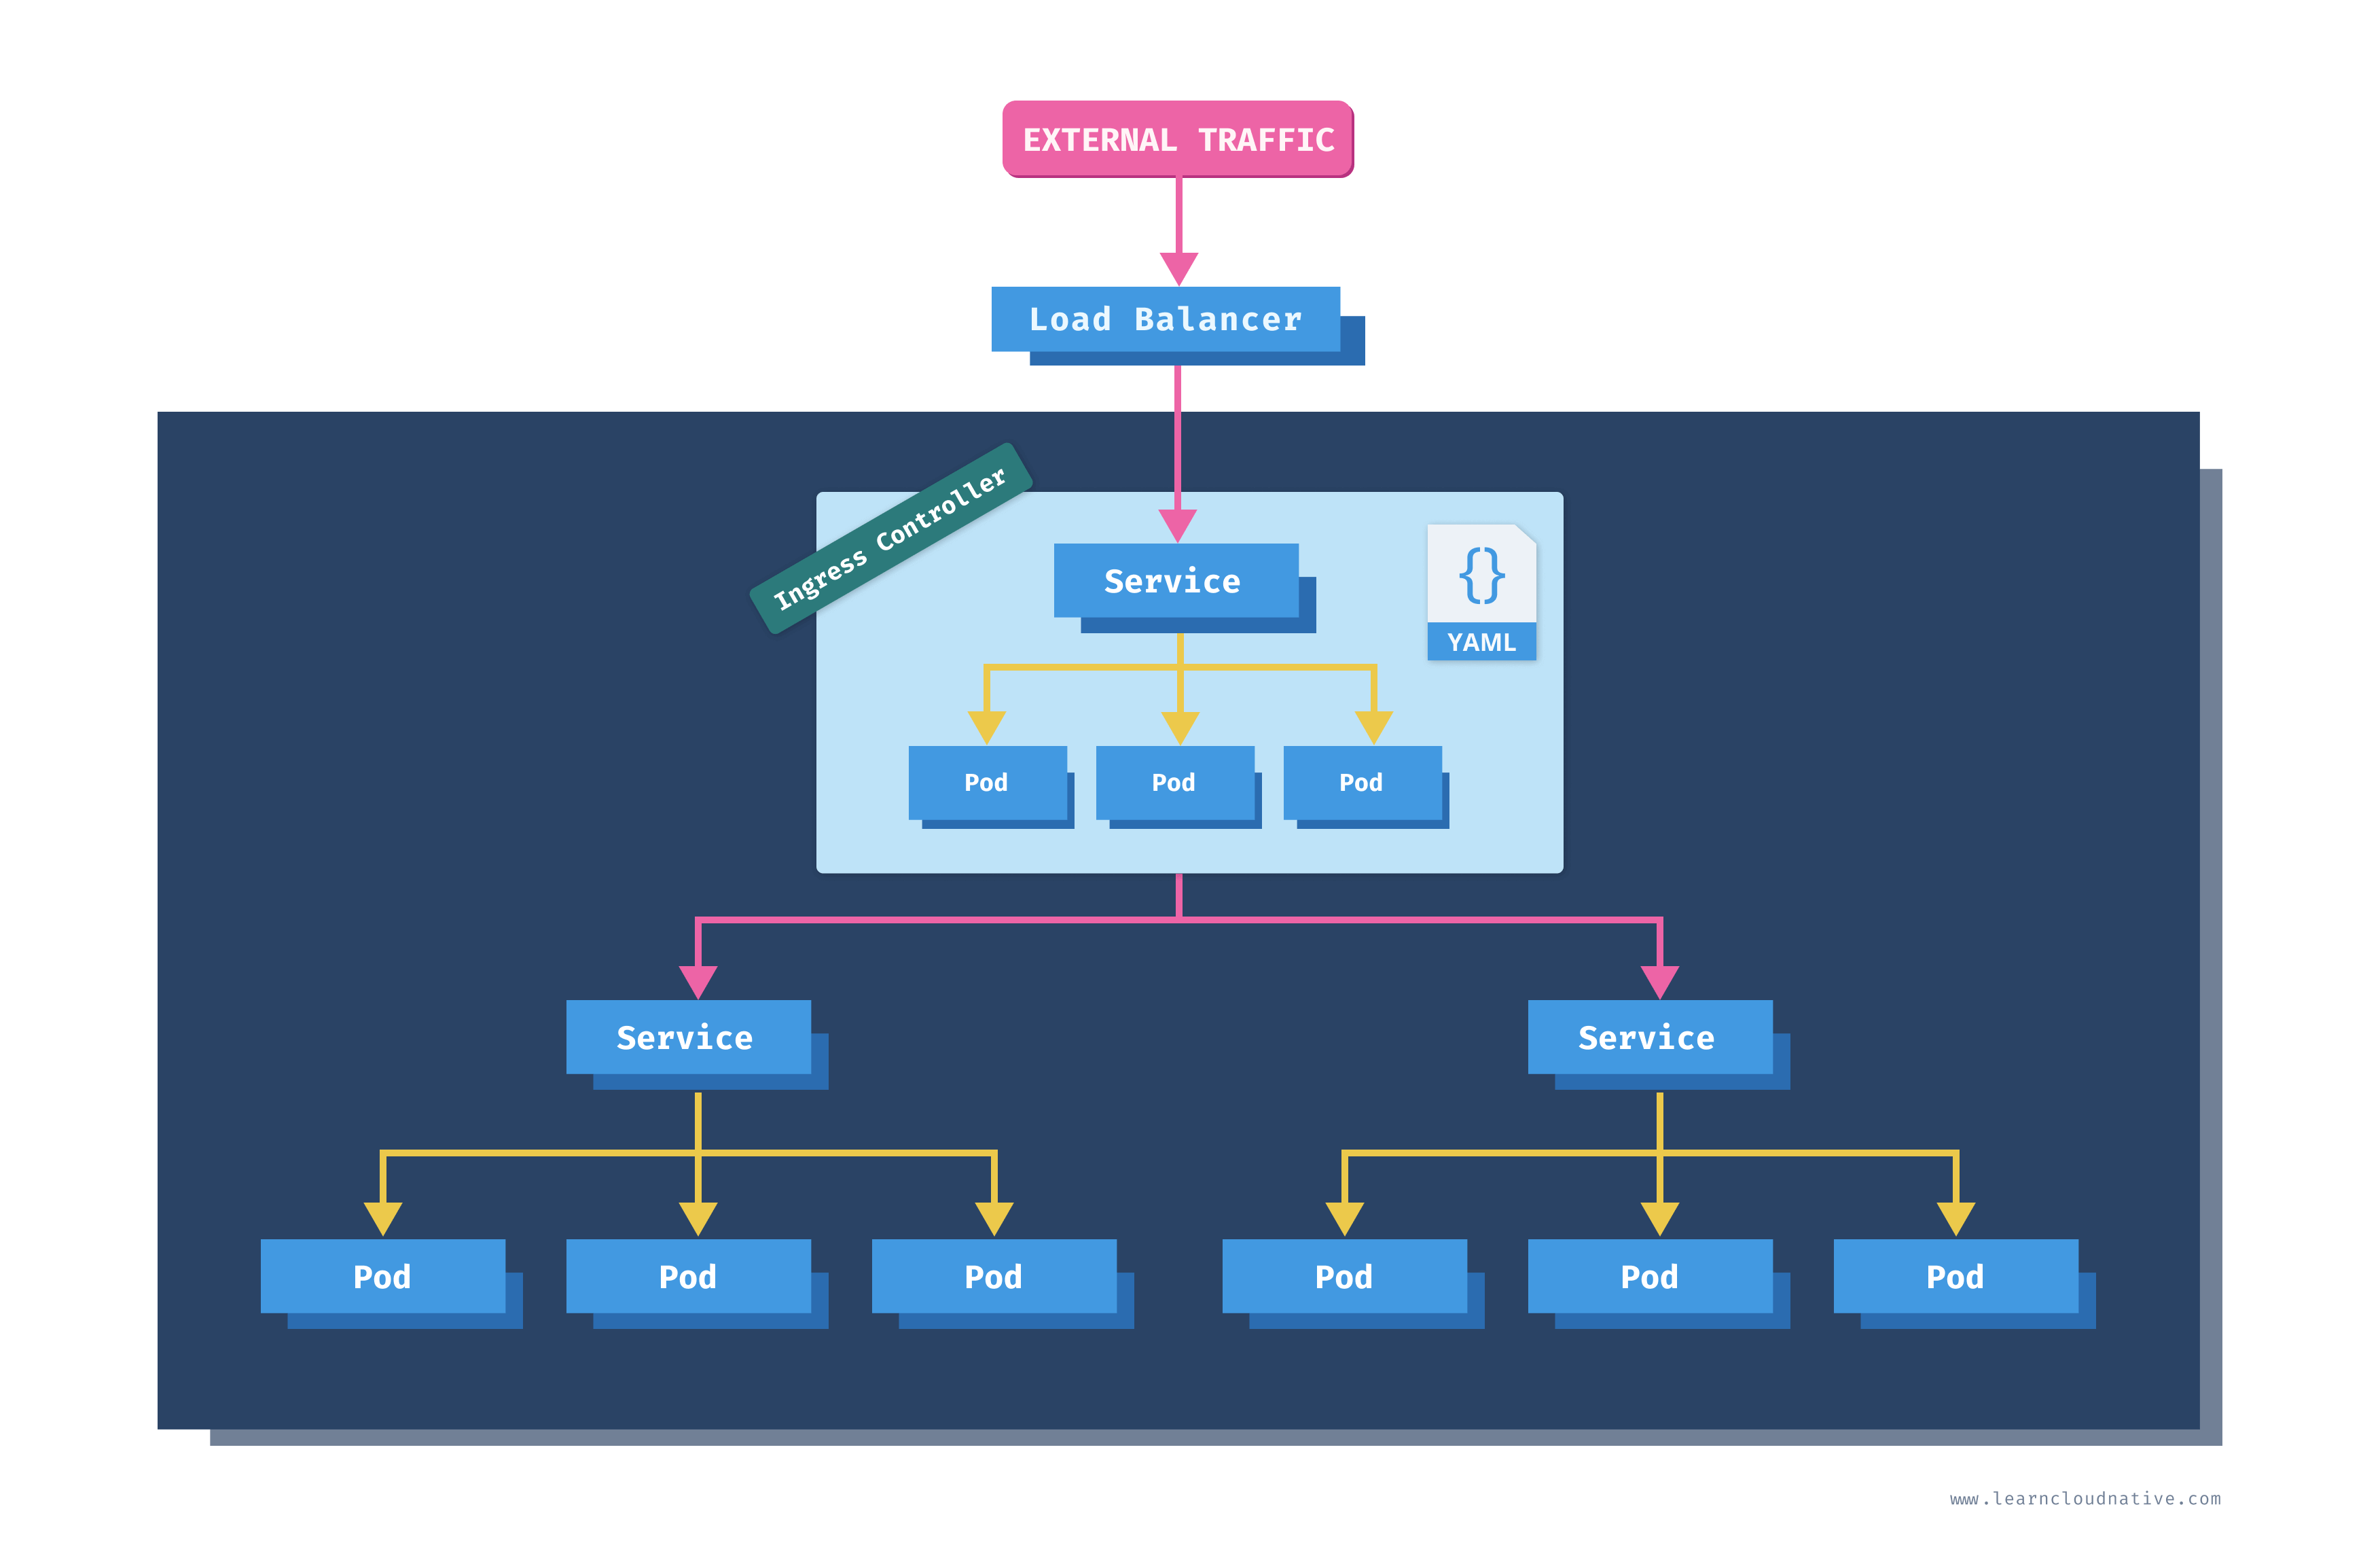
An ingress controller is a collection of the following items:
- Kubernetes deployment running one or more pods with containers running a gateway/proxy server such as NGINX, Ambassador, etc.
- Kubernetes service that exposes the ingress controller pods
- Other supporting resources for the ingress controller (configuration maps, secrets, ...)
Note
How about the load balancer? The load balancer is not necessarily part of the Ingress controller. The Kubernetes service used for the ingress controller can be of the LoadBalancer type which triggers the creation of a load balancer if using a cloud-managed Kubernetes cluster. It is merely a way for the traffic to enter your cluster and subsequently the ingress controller that routes the traffic according to the rules. You can read more about Services and LoadBalancer type in Getting Started with Kubernetes.
The idea is that you can deploy the ingress controller, expose it on a public IP address, then use the Ingress resource to create the traffic rules. Here's how an Ingress resource would look like:
apiVersion: networking.k8s.io/v1beta1
kind: Ingress
metadata:
  name: ingress-example
spec:
  rules:
    - host: example.com
      http:
        paths:
          - path: /blog
            backend:
              serviceName: my-blog-service
              servicePort: 5000
          - path: /music
            backend:
              serviceName: my-music-service
              servicePort: 8080
With these rules we are routing traffic that comes in to
example.com/blog to a Kubernetes service my-blog-service:5000. Similarly, any traffic coming to example.com/music goes to a Kubernetes service my-music-service:8080.Note
The ingress resource will also contain one or more annotations to configure the Ingress controller. The annotations and options you can configure will depend on the ingress controller you're using.
Let's say we want to run two websites in our cluster - the first one will be a simple Hello World website and the second one will be a Daily Dog Picture website that shows a random dog picture.
Assuming you have your cluster up and running, let's create the deployments for these two websites.
apiVersion: apps/v1
kind: Deployment
metadata:
  name: hello-world
  labels:
    app.kubernetes.io/name: hello-world
spec:
  replicas: 1
  selector:
    matchLabels:
      app.kubernetes.io/name: hello-world
  template:
    metadata:
      labels:
        app.kubernetes.io/name: hello-world
    spec:
      containers:
        - name: hello-world-container
          image: learncloudnative/helloworld:0.1.0
          ports:
            - containerPort: 3000
Save the Deployment YAML to
helloworld-deployment.yaml file and run kubectl apply -f helloworld-deployment.yaml to create the hello-world deployment. Next, we will deploy the Daily Dog Picture website.apiVersion: apps/v1
kind: Deployment
metadata:
name: dogpic-web
labels:
app.kubernetes.io/name: dogpic-web
spec:
replicas: 1
selector:
matchLabels:
app.kubernetes.io/name: dogpic-web
template:
metadata:
labels:
app.kubernetes.io/name: dogpic-web
spec:
containers:
- name: dogpic-container
image: learncloudnative/dogpic-service:0.1.0
ports:
- containerPort: 3000
Save the YAML to a file and run
kubectl apply -f docpic-deployment.yaml to deploy the Daily Dog Picture website. Make sure both pods from both deployments are up and running:$ kubectl get pods
NAME READY STATUS RESTARTS AGE
dogpic-web-559f4bb5db-dlrks 1/1 Running 0 24m
hello-world-5fd44c56d7-d8g4j 1/1 Running 0 29m
We still need to deploy the Kubernetes Services for both of these deployments. The services will be of default,
ClusterIP type, so there's no need to explicitly set the type field. You can refer to Getting Started with Kubernetes article for the explanation of the ClusterIP service.kind: Service
apiVersion: v1
metadata:
name: dogpic-service
labels:
app.kubernetes.io/name: dogpic-web
spec:
selector:
app.kubernetes.io/name: dogpic-web
ports:
- port: 3000
name: http
---
kind: Service
apiVersion: v1
metadata:
name: hello-world
labels:
app.kubernetes.io/name: hello-world
spec:
selector:
app.kubernetes.io/name: hello-world
ports:
- port: 3000
name: http
Create the above services by saving the contents to
services.yaml and running kubectl apply -f services.yaml.Note
You can use---as a separator in YAML files to deploy multiple resources from a single file.
Installing the Ambassador API gateway
Before we create the Ingress resource we need to deploy an Ingress controller. The job of an ingress controller is to receive the incoming traffic and route it based on the rules defined in the Ingress resource.
You have multiple options you can go with for the Ingress controller. Some of the gateways and proxies you could use are:
You can find the list of other controllers in the Kubernetes ingress controller documentation.
If you want to learn more about gateways and proxies, check out the Beginners guide to gateways and proxies article.
In this example, I'll be using the open source version of the Ambassador API Gateway.
Note
"I heard ABC/XZY/DEF is much better than GHI and JKL". Yep, that very well might be true. My purpose is to explain what an Ingress resource is and how it works. Some of the ingress controllers use their own custom resources, instead of the default Kubernetes Ingress resource. That way, they can support more features than the default Ingress resource. I would encourage you to explore the available options and pick the one that works best for you.
To deploy the Ambassador API gateway we will start by deploying the custom resource definitions (CRDs) the gateway uses:
$ kubectl apply -f https://www.getambassador.io/yaml/ambassador/ambassador-crds.yaml
customresourcedefinition.apiextensions.k8s.io/authservices.getambassador.io created
customresourcedefinition.apiextensions.k8s.io/consulresolvers.getambassador.io created
customresourcedefinition.apiextensions.k8s.io/hosts.getambassador.io created
customresourcedefinition.apiextensions.k8s.io/kubernetesendpointresolvers.getambassador.io created
customresourcedefinition.apiextensions.k8s.io/kubernetesserviceresolvers.getambassador.io created
customresourcedefinition.apiextensions.k8s.io/logservices.getambassador.io created
customresourcedefinition.apiextensions.k8s.io/mappings.getambassador.io created
customresourcedefinition.apiextensions.k8s.io/modules.getambassador.io created
customresourcedefinition.apiextensions.k8s.io/ratelimitservices.getambassador.io created
customresourcedefinition.apiextensions.k8s.io/tcpmappings.getambassador.io created
customresourcedefinition.apiextensions.k8s.io/tlscontexts.getambassador.io created
customresourcedefinition.apiextensions.k8s.io/tracingservices.getambassador.io created
Note
What is the difference betweencreateandapply? It's a difference between imperative management (create) and declarative management (apply). Using thecreatecommand you are telling Kubernetes which resources to create or delete. Withapplyyou are telling Kubernetes how you want your resources to look like. You don't define operations to be taken as you would withcreateordelete. You are letting Kubernetes detect the operations for each object. Let's say you used thecreatecommand and create a deployment with imageimage:123. If you want to change the image in the deployment toimage:999you won't be able to use thecreatecommand as the deployment already exists. You'd have to delete the deployment first, then create it again. Using theapplycommand, you don't need to delete the deployment. The apply command will 'apply' the desired changes to an existing resource (i.e. update the image name in our case). Both approaches can be used in production. Using a declarative approach Kubernetes determines the changes needed for each object. Any configuration changes made with the declarative approach are retained with the object. If you're using an imperative approach the changes made previously will be gone as you will be doing a replace operation. On the other hand, declarative approach can be harder to debug, because the resulting object is not necessarily the same as in the file that was being applied.
The next step is to create the Ambassador deployment (
ambassador) and other resources needed to run the API gateway:$ kubectl apply -f https://www.getambassador.io/yaml/ambassador/ambassador-rbac.yaml
service/ambassador-admin created
clusterrole.rbac.authorization.k8s.io/ambassador created
serviceaccount/ambassador created
clusterrolebinding.rbac.authorization.k8s.io/ambassador created
deployment.apps/ambassador created
Note
RBAC stands for Role Based Access Control and it is a way of controlling access to resources based on the roles. For example, using RBAC you can create roles calledadminandnormaluser, and then allow admin role access to everything andnormaluseronly access to a certain namespaces or control if they can create or just view resources.
Let's see the resources that were created when we deployed the Ambassador API gateway:
$ kubectl get deploy
NAME          READY   UP-TO-DATE   AVAILABLE   AGE
ambassador    3/3     3            3           30m
dogpic-web    1/1     1            1           2d
hello-world   1/1     1            1           2d

$ kubectl get svc
NAME               TYPE        CLUSTER-IP       EXTERNAL-IP   PORT(S)          AGE
ambassador-admin   NodePort    10.107.45.225    <none>        8877:31524/TCP   30m
dogpic-service     ClusterIP   10.110.213.161   <none>        3000/TCP         48m
hello-world        ClusterIP   10.109.157.27    <none>        3000/TCP         48m
kubernetes         ClusterIP   10.96.0.1        <none>        443/TCP          66d
The default installation creates 3 Ambassador pods and the
ambassador-admin service.We need to separately create a LoadBalancer service that will route traffic to the
ambassador pods.apiVersion: v1
kind: Service
metadata:
name: ambassador
spec:
type: LoadBalancer
externalTrafficPolicy: Local
ports:
- port: 80
targetPort: 8080
selector:
service: ambassador
Create the load balancer service for Ambassador, by running
kubectl apply -f ambassador-service.yaml.If you list the services again, you will notice the
ambassador service doesn't have an IP address in the EXTERNAL-IP column. Note that this is only because we are running a cluster locally. If we would use a cloud-managed cluster, this would create an actual load balancer instance in our cloud account and we would get a public/private IP address we could use to access the services.$ kubectl get svc
NAME TYPE CLUSTER-IP EXTERNAL-IP PORT(S) AGE
ambassador LoadBalancer 10.109.103.63 <pending> 80:32004/TCP 10d
ambassador-admin NodePort 10.107.45.225 <none> 8877:31524/TCP 10d
dogpic-service ClusterIP 10.110.213.161 <none> 3000/TCP 10d
hello-world ClusterIP 10.109.157.27 <none> 3000/TCP 10d
kubernetes ClusterIP 10.96.0.1 <none> 443/TCP 77d
With Minikube you can access the
NodePort services using the combination of the cluster IP and the port number (e.g. 32004 or 31524). The command minikube ip gives you the clusters' IP address (192.168.64.3 in this case). You could use that IP and the NodePort, for example 32004 for the ambassador service, and access the service.Even better, you could use the
minikube service command and have Minikube open the correct IP and port number. Try and run the following command:$ minikube service ambassador
|-----------|------------|-------------|---------------------------|
| NAMESPACE | NAME | TARGET PORT | URL |
|-----------|------------|-------------|---------------------------|
| default | ambassador | | http://192.168.64.3:32004 |
|-----------|------------|-------------|---------------------------|
🎉 Opening service default/ambassador in default browser...
The page won't render, because we haven't created any Ingress rules yet, however, you can try and navigate to
http://192.168.64.3:32004/ambassador/v0/diag to open the Ambassador diagnostics page.You could open any other service that's of type
NodePort using the same command.However, we want to use the LoadBalancer service type and a completely different IP address, so we don't have to deal with the cluster IP or the node ports. The
tunnel command can be used to create a route to all services deployed with LoadBalancer type.Since this command has to be running, open a separate terminal window and run
minikube tunnel:$ minikube tunnel
Status:
machine: minikube
pid: 50383
route: 10.96.0.0/12 -> 192.168.64.3
minikube: Running
services: [ambassador]
errors:
minikube: no errors
router: no errors
loadbalancer emulator: no errors
Note
Minikubes'tunnelcommand needs admin privileges, so you might get prompted for a password.
The tunnel command creates a network route on your computer to the service CIDR (Classless Inter-Domain Routing) of the cluster. The
10.96.0.0/12 CIDR includes IPs starting from 10.96.0.0 to 10.111.255.255. This network route uses the cluster's IP address (192.168.64.3) as a gatway. You can also get the Minikube clusters' IP address by running minikube ip command.Let's list the services again, and this time the
ambassador service will get an actual IP address that falls in the CIDR from the tunnel command:$ kubectl get svc
NAME TYPE CLUSTER-IP EXTERNAL-IP PORT(S) AGE
ambassador LoadBalancer 10.102.244.196 10.102.244.196 80:30395/TCP 1h
ambassador-admin NodePort 10.106.191.105 <none> 8877:32561/TCP 21h
dogpic-service ClusterIP 10.104.72.244 <none> 3000/TCP 21h
hello-world ClusterIP 10.108.178.113 <none> 3000/TCP 21h
kubernetes ClusterIP 10.96.0.1 <none> 443/TCP 67d
Since we will be using the external IP address, let's store it in an environment variable, so we don't have to type it out each time:
$ export AMBASSADOR_LB=10.102.244.196
Now we can open the build-in Ambassador diagnostic web site by navigating to:
http://AMBASSADOR_LB/ambassador/v0/diag (replace the AMBASSADOR_LB with the actual IP address).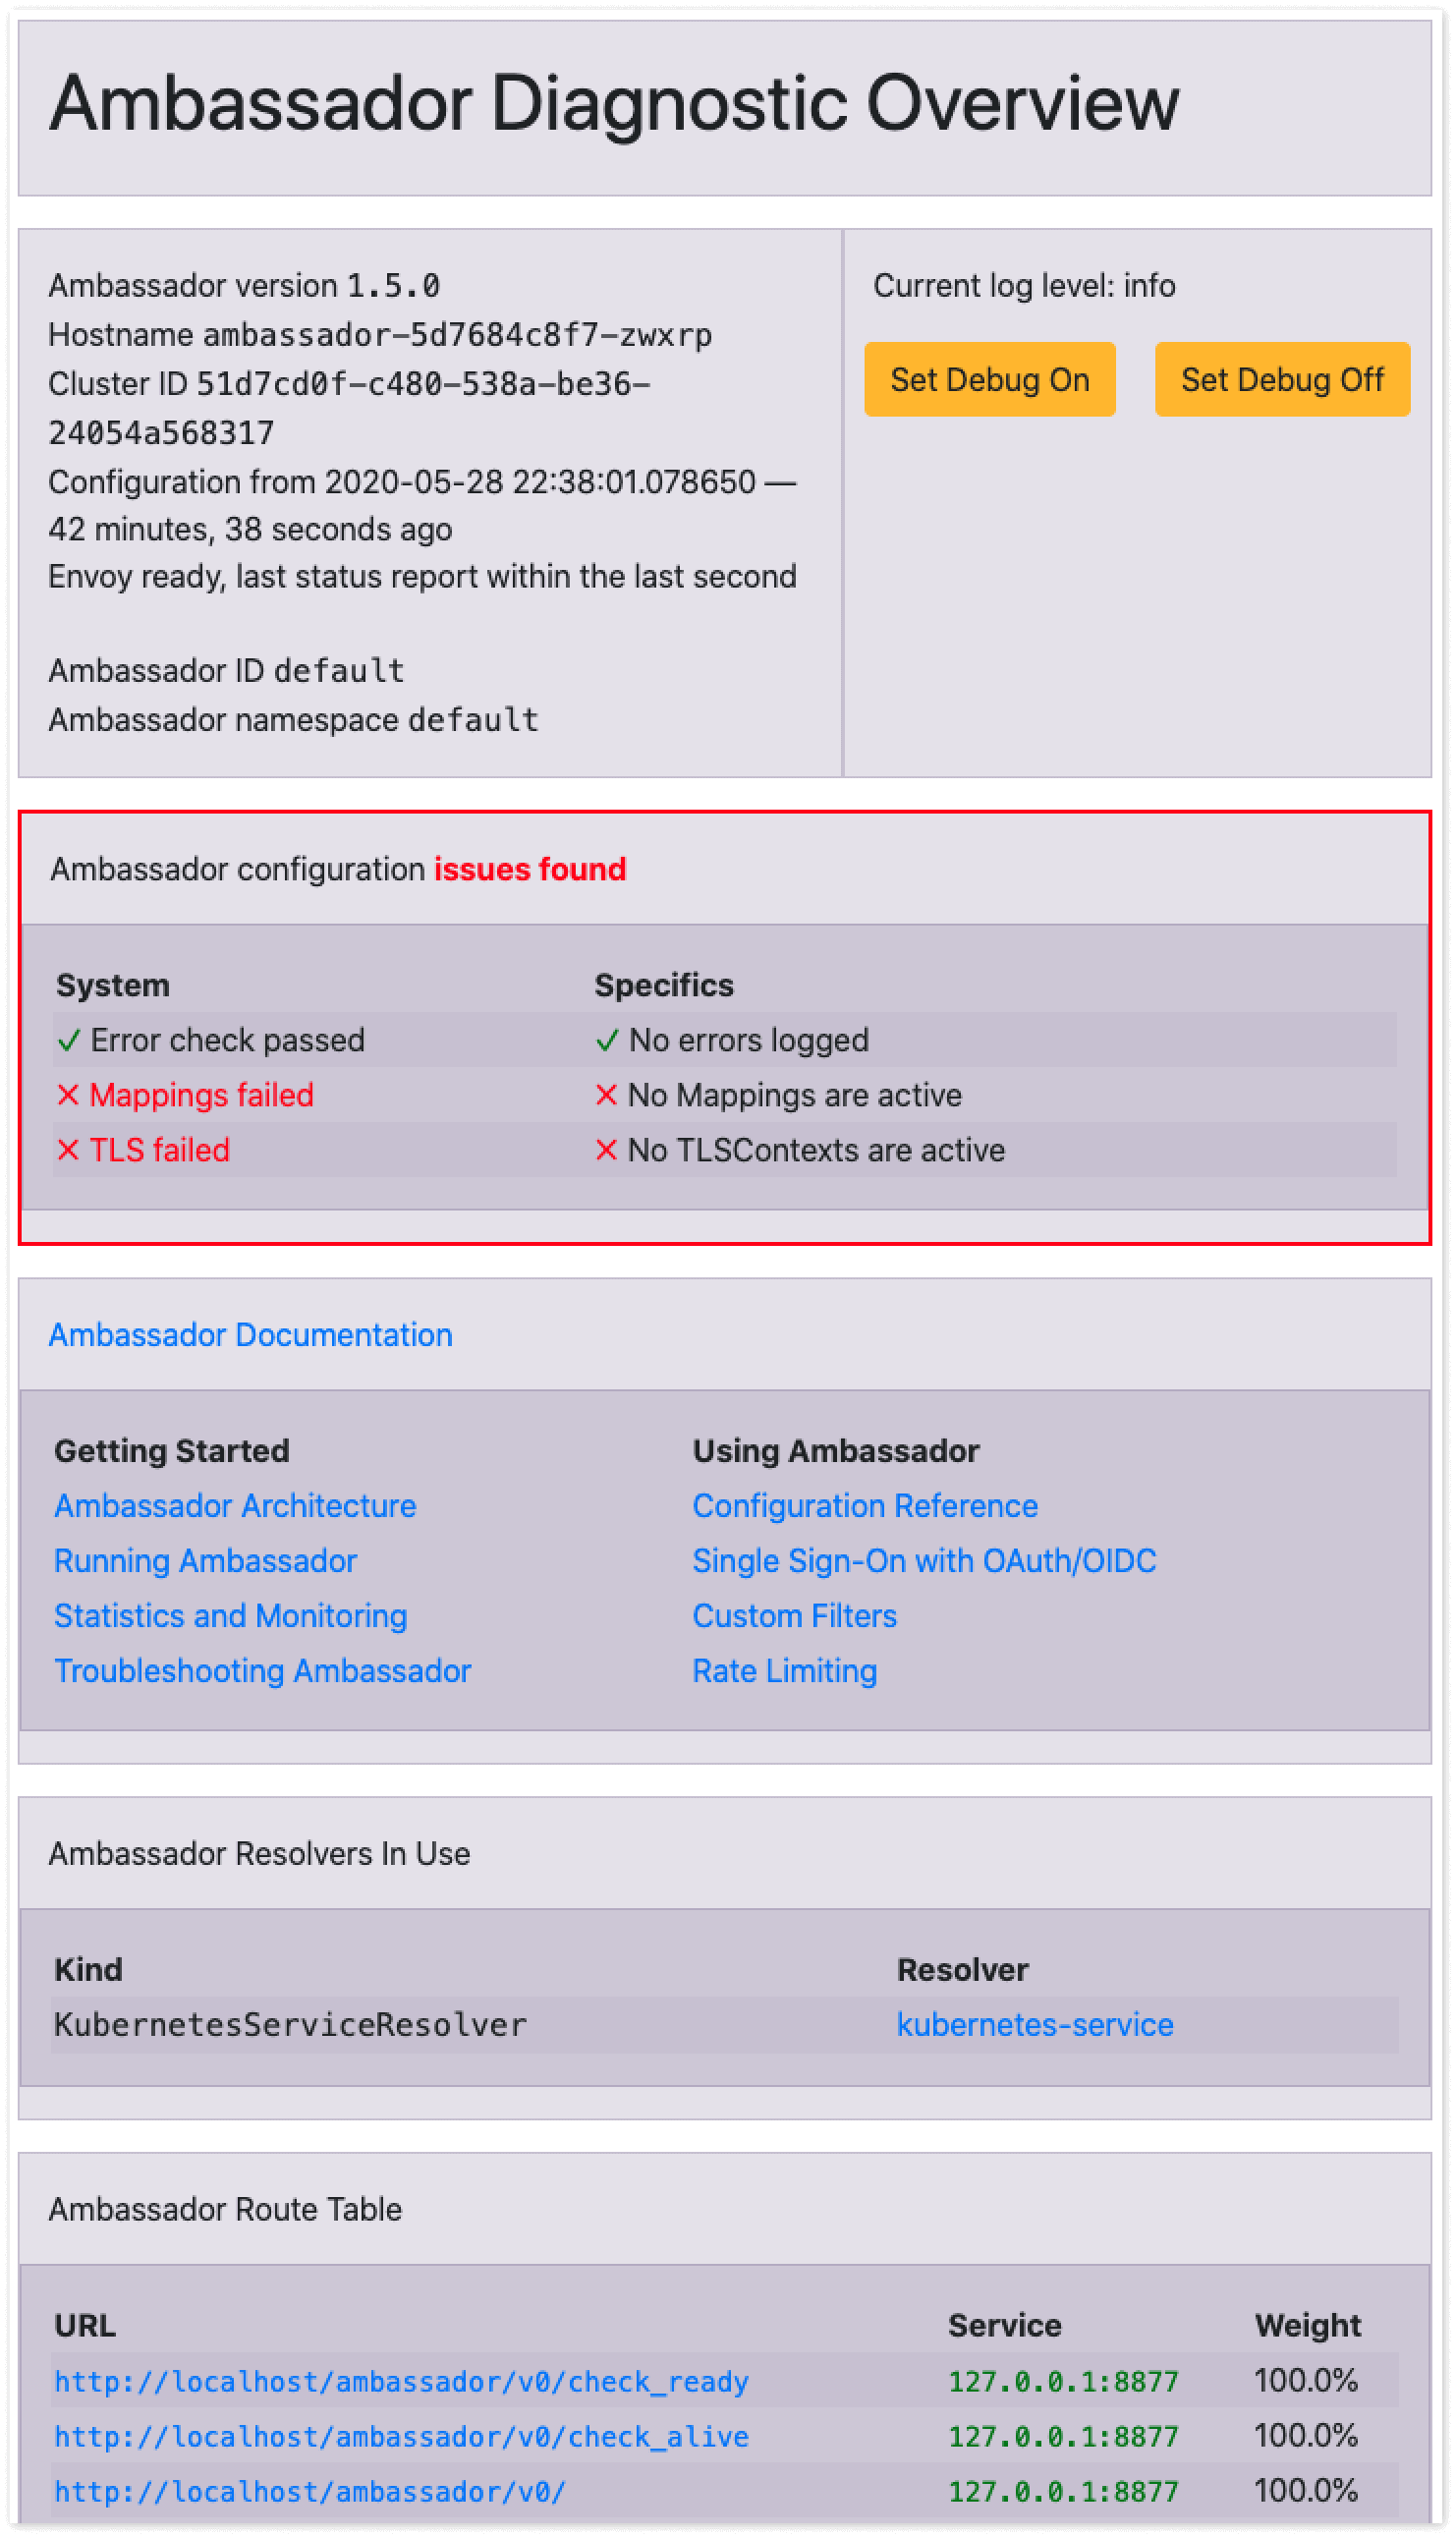
The Ambassador API gateway diagnostics page gives you an overview of the gateway. You could use this if you are running into any issues or if you need to debug something. Of course, you can also turn this diagnostics page off for any production scenarios.
Single service Ingress
Now that we have the ingress controller up and running we can create an Ingress resource.
The simplest version of an Ingress resource is one without any rules where all traffic is directed to the same backend service, regardless which host the traffic comes from.
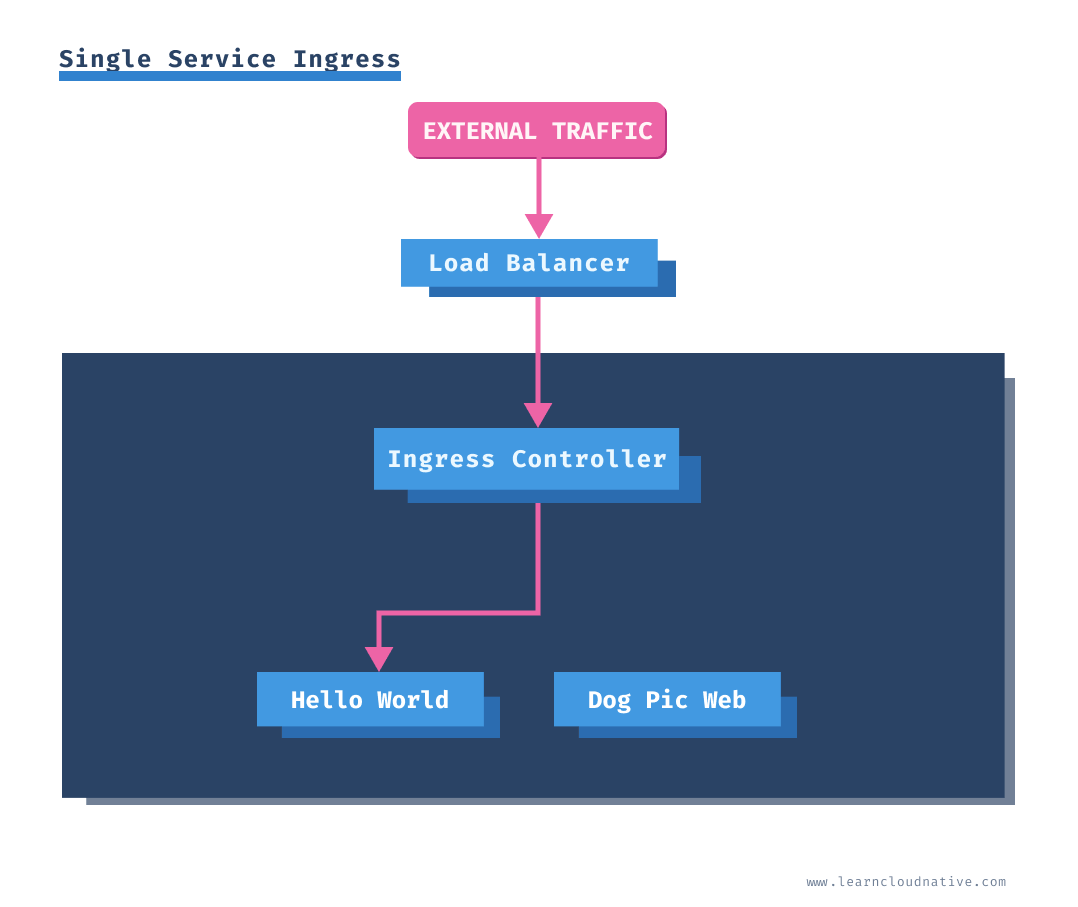
Let's create an Ingress that only defines a backend service and doesn't have any rules.
apiVersion: extensions/v1beta1
kind: Ingress
metadata:
  annotations:
    kubernetes.io/ingress.class: ambassador
  name: my-ingress
spec:
  backend:
    serviceName: hello-world
    servicePort: 3000
Save the YAML to
single-service-ing.yaml and deploy it using kubectl apply -f single-service-ing.yaml command.We used the following annotation
kubernetes.io/ingress/class: ambassador in the above YAML. The Ambassador controller uses this annotation to claim the Ingress resource and any traffc sent to the controller will be using the rules defined in the Ingress resource.If you list the Ingress resources, you will see the created resource:
$ kubectl get ing
NAME         CLASS    HOSTS   ADDRESS   PORTS   AGE
my-ingress   <none>   *                 80      1h
The
* in the HOSTS column means that there are no hosts defined. Later, when we define per-host rules you will see those rules show up under the HOSTS column.If you open the browser and navigate to the same IP as before (
http://AMBASSADOR_LB), the Hello World website will show up.Path-based routing with Ingress
Since we want to expose two services through the Ingress, we need to write some rules. Using a path configuration you can route traffic from one host name to multiple services based on the path in the URI.
In this example we want to route traffic from
http://AMBASSADOR_LB/hello to the Hello World service and traffic from http://AMBASSADOR_LB/dog to Dog Pic Service.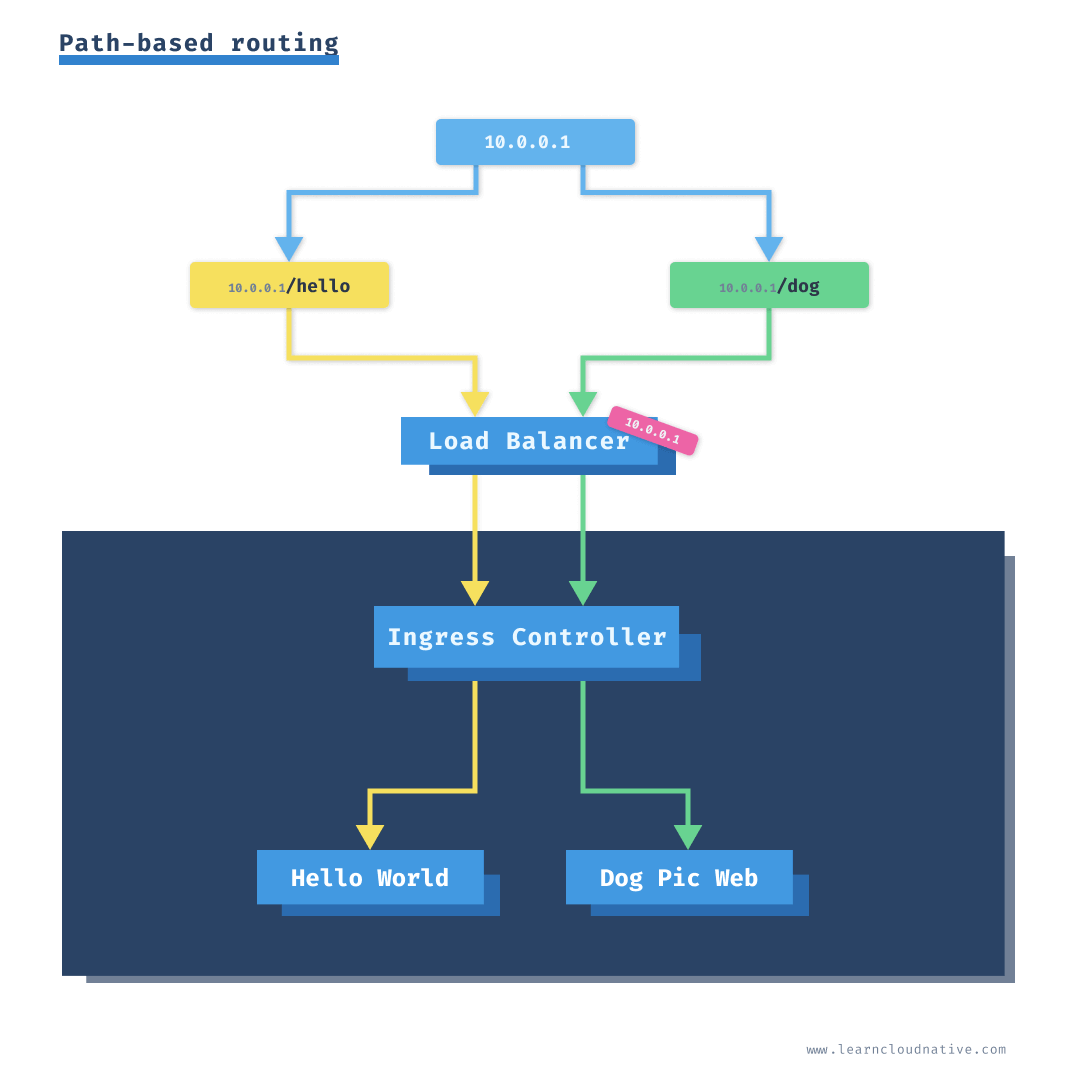
To do that, we will define two rules in the Ingress resource:
apiVersion: extensions/v1beta1
kind: Ingress
metadata:
  annotations:
    kubernetes.io/ingress.class: ambassador
  name: my-ingress
spec:
  rules:
    - http:
        paths:
          - path: /hello
            backend:
              serviceName: hello-world
              servicePort: 3000
          - path: /dog
            backend:
              serviceName: dogpic-service
              servicePort: 3000
Save the above ingress to
path-ing.yaml and run kubectl apply -f path-ing.yaml. Let's look at the details of the created Ingress resource using the describe command:$ kubect describe ing my-ingress
Name: my-ingress
Namespace: default
Address:
Default backend: default-http-backend:80 (<error: endpoints "default-http-backend" not found>)
Rules:
Host Path Backends
---- ---- --------
*
/hello hello-world:3000 (172.17.0.4:3000)
/dog dogpic-service:3000 (172.17.0.5:3000)
Annotations: kubernetes.io/ingress.class: ambassador
Events: <none>
Under the rules section you will see the two paths we defined and the backends (service names).
If you navigate to
http://AMBASSADOR_LB/hello the Hello World website will render, and if you navigate to http://AMBASSADOR_LB/dog you will get the Dog Pic website.Let's take this a step further. Wouldn't it be nice if we could type in
http://example.com/dog instead of the IP address?Using a hostname instead of an IP address
If we want to use a hostname we will have to specify it in the Ingress resource, so the controller knows for which hosts and where to direct the traffic.
apiVersion: extensions/v1beta1
kind: Ingress
metadata:
  annotations:
    kubernetes.io/ingress.class: ambassador
  name: my-ingress
spec:
  rules:
    - host: example.com
      http:
        paths:
          - path: /hello
            backend:
              serviceName: hello-world
              servicePort: 3000
          - path: /dog
            backend:
              serviceName: dogpic-service
              servicePort: 3000
Copy the above contents to
hostname-ing.yaml file and run kubectl apply -f hostname-ing.yaml to create the ingress.This time we defined a host name (
example.com) and that will show up when you get the Ingress details:$ kubectl describe ing my-ingress
Name: my-ingress
Namespace: default
Address:
Default backend: default-http-backend:80 (<error: endpoints "default-http-backend" not found>)
Rules:
Host Path Backends
---- ---- --------
example.com
/hello hello-world:3000 (172.17.0.4:3000)
/dog dogpic-service:3000 (172.17.0.5:3000)
Annotations: kubernetes.io/ingress.class: ambassador
Events: <none>
Notice how the
Host column contains the actual host we defined - example.com.If you try to navigate to the same Ambassador load balancer address as before (
http://AMBASSADOR_LB) you will get an HTTP 404 error. This is expected, because we explicitly defined the host (example.com), but we haven't defined a default backend service - this is a service traffic gets routed to if none of the rules evaluate to true. We will see how to do that later on.There are multiple ways you can access the IP address using a host name.
The simplest way is to set a
Host header when making a request from the terminal. For example:$ curl -H "Host: example.com" http://$AMBASSADOR_LB/hello
<link rel="stylesheet" type="text/css" href="css/style.css" />
<div class="container">
Hello World!
</div>
This works, but it would be much better if we could do the same through a browser.
I am using a browser extension called ModHeader. This extension allows you to set the same Host header in your browser.
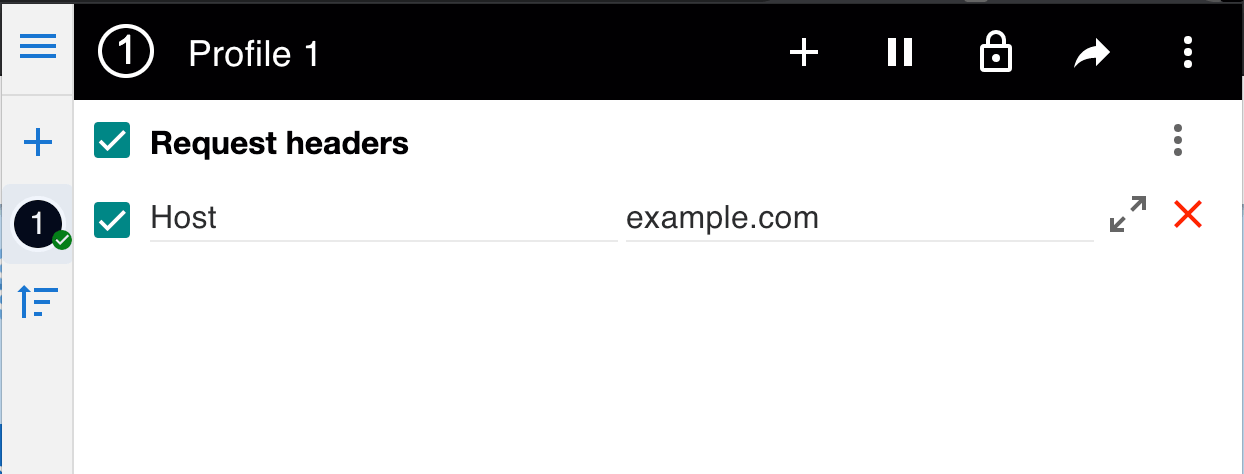
If you navigate to
http://$AMBASSADOR_LB/hello or http://$AMBASSADOR_LB/dog you will notice both web pages will load. This option works well as you can actually load the page in the browser. However, it would be really cool if we can use the host name e.g. example.com/dog for example.You can modify the
hosts file on your computer that allows you to map hostnames to IP addresses. You can map the IP address ($AMBASSADOR_LB) to example.com.Open the
/etc/hosts file (or %SystemRoot%\System32\drivers\etc\hosts on Windows) and add the line mapping the hostname to an IP address. Make sure you use sudo or open the file as administrator on Windows.$ sudo vim /etc/hosts
...
10.102.244.196 example.com
...
Save the file and if you navigate to
example.com/hello or example.com/dog you will see both pages open. Make sure to uncheck/delete the header you have set with ModHeader.Next, let's see how we can set a default backend that receives the traffic if none of the rules are matched.
Setting a default backend
In most cases the default backend will be set by the Ingress controller. Some Ingress controllers automatically install a default backend service as well (NGINX for example). Then, to configure the default backend, you can use either an annotation or one of the custom resource definitions that the install Ingress controller supports.
Since we don't want to dig into specifics of Ingress controllers, we will set the default backend directly in the Ingress resource. Ideally you would be using your Ingress controller configuration and set the default backend there. To be completely honest, you might even just use the custom resources each Ingress controller supports, instead of the vanilla Kubernetes Ingress resource.
For this example we will set the default backend to the
hello-world service. Here's the updated Ingress resource, with modified lines highlighted:apiVersion: extensions/v1beta1
kind: Ingress
metadata:
annotations:
kubernetes.io/ingress.class: ambassador
name: my-ingress
spec:
rules:
- host: example.com
http:
paths:
- path: /hello
backend:
serviceName: hello-world
servicePort: 3000
- path: /dog
backend:
serviceName: dogpic-service
servicePort: 3000
backend:
serviceName: hello-world
servicePort: 3000
Deploy the updated ingress with
kubectl apply -f default-backend-ing.yaml. If you describe the Ingress resource using the describe command, you will get a nice view of all rules and the default backend that we just set:$ kubectl describe ing my-ingress
Name: my-ingress
Namespace: default
Address:
Default backend: hello-world:3000 (172.17.0.8:3000)
Rules:
Host Path Backends
---- ---- --------
example.com
/hello hello-world:3000 (172.17.0.8:3000)
/dog dogpic-service:3000 (172.17.0.9:3000)
Annotations: kubernetes.io/ingress.class: ambassador
Events: <none>
If you open
http://example.com you will notice that this time the Hello World web page will load. The /hello and /dog endpoints will still work the same way as before.Name-based Ingress
Sometimes you don't want to use the fanout option with paths, instead you want to route the traffic based on the subdomains. For example, routing
example.com to one service, dogs.example.com to another and so on. For this example, we will try to set up the following rules:| Host name | Kubernetes service |
|---|---|
| example.com | hello-world:3000 |
| dog.example | dogpic-service:3000 |
To create the above rules, we need to add two
host entries under the rules section of the Ingress resource. Under each host entry we define the paths and the backend service and port name we want to route the traffic to.apiVersion: extensions/v1beta1
kind: Ingress
metadata:
annotations:
kubernetes.io/ingress.class: ambassador
name: my-ingress
spec:
rules:
- host: example.com
http:
paths:
- backend:
serviceName: hello-world
servicePort: 3000
- host: dog.example.com
http:
paths:
- backend:
serviceName: dogpic-service
servicePort: 3000
Copy the above contents to
name-ing.yaml and deploy it using kubectl apply -f name-ing.yaml.Before we can try this out we need to add the
dog.example.com to the hosts file just like we did with the example.com. Open the /etc/hosts file (or %SystemRoot%\System32\drivers\etc\hosts on Windows) and add the line mapping the dog.example.com hostname to the IP address. Make sure you use sudo or open the file/terminal as an administrator on Windows.$ sudo vim /etc/hosts
...
10.102.244.196 example.com
10.102.244.196 dog.example.com
...
Note
When using a real domain name the entries we added to thehostsfile would correspond to the DNS records at your domains registrar. With an A record you can map a name (example.com) to a stable IP address. Forexample.comyou would create an A record that points to the external IP address. Another commonly used record is the CNAME record. CNAME is used for mapping one name to another name. You would use the CNAME if you wanted to mapdog.mydomain.comtodog.example.com, whiledog.example.comis using an A record and maps to an IP. In the end, thedog.mydomain.comwould resolve to the IP address, same asdog.example.com.
Save the file, open the browser and navigate to
http://example.com. You should see the response from the Hello World service as shown below.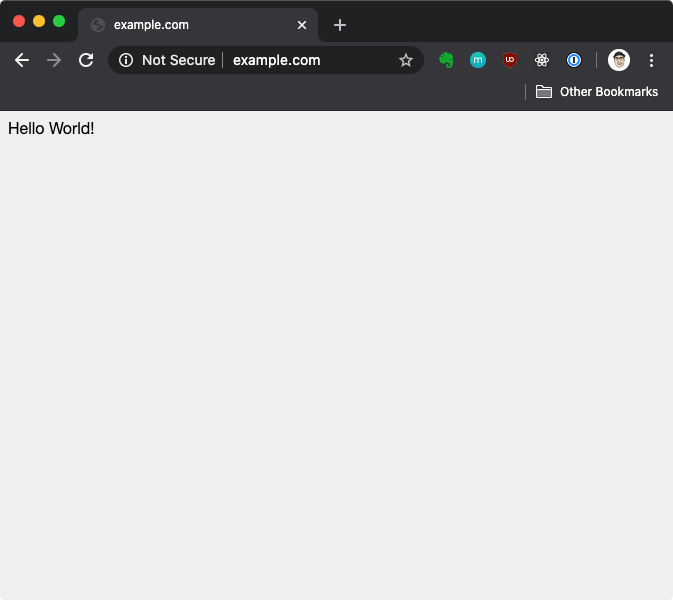
Simiarly, if you enter
http://dog.example.com you will get the Dog Pic website.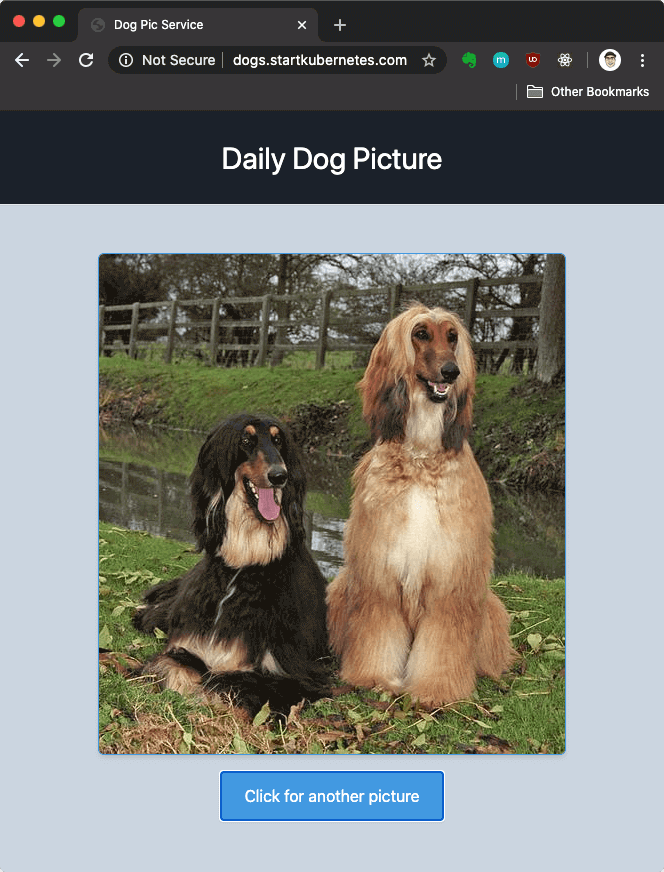
Cleanup
You can delete the Service, Deployments, and Ingress using the
kubectl delete command. For example, to delete the dogpic-web deployment, run:$ kubectl delete deploy dogpic-web
deployment.apps "dogpic-web" deleted
To delete a different resource replace the resource name (
deploy in the above example) with ingress or service.Another way of deleting the resources is by providing the YAML file that was used to create the resource. For example, if you created the
dogpic-web from a file called dogpic.yaml you can delete it like this:$ kubectl delete -f dogpic.yaml
If at any point you get completely stuck and can't delete something or you delete too much (everyone has done that at some point) you can always just reset your cluster. If you're using Minikube you can run
minikube delete to delete the cluster and afterwards run minikube start to get a fresh cluster.Conclusion
The next article in this series will talk about how to protect your Ingress using an SSL certificate.
I have also started preorders for my new course called Start Kubernetes. This course includes everything I know about Kubernetes in an ebook, set of videos and practial labs.
Questions and Comments
I am always eager to hear your questions and comments. You can reach me on Twitter or send me a message.
If you are interested in more articles and topics like this one, make sure you sign up for my newsletter.